sugar cookie perfection

October 19th, 2019 thecookieblogger Posted in daily cookie diary Comments Off on sugar cookie perfection

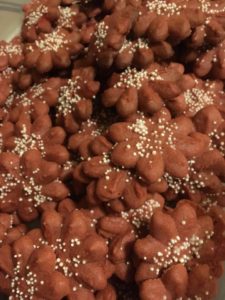
if you needed a cookie that meets the demands of every holiday season, the sugar cookie would definitely be in the running. they are easy to make, can be shaped into pumpkins for halloween, autumn leaves for thanksgiving, dreidels for chanukah, and santas for christmas. design-wise, they certainly fit the bill.

but often those sugar cookies end up dense, tough, and tasteless. maybe because they’re overworked by the continuous rolling out of the dough. or maybe it’s just too much flour added in to keep them from sticking to the rolling pin. whatever the cause, they often look terrific, but taste pretty blah.

well, i promise you, with this sugar cookie recipe, the blahs are long gone, and you’ll have a tasty cookie that can look good too! this is my go-to recipe for the holidays, but it also does great with a simple sugar sprinkling on top. and you’ll note, i bake some a bit longer, giving a richer color and a crispier cookie, while baking some a bit less for the soft cookie-lovers in my circle. then, everyone is happy!

please give these a try, and let me know what you think. feel free to substitute 1/2 teaspoon of almond extract in place of 1/2 teaspoon of vanilla, and see how just that simple swap changes the flavor exponentially! it’s worth experimenting!

looking forward to hearing how these work for you! happy baking! and if you’re looking to start making your holiday cookie baking list, take a look at one of my past year’s cookie trays for inspiration!!

perfect sugar cookies

ingredients:

1 and 1/2 cups butter, softened

2 cups granulated sugar

4 eggs

1 tsp. vanilla

5 cups all-purpose flour

2 tsp. baking powder

1 tsp. salt

instructions:

  1. in a large bowl, cream the butter and sugar until smooth.
  2. beat in eggs and vanilla
  3. stir in flour, baking powder, and salt.
  4. cover and chill at least 1 hour (or up to 24 hours)
  5. preheat oven to 400 degrees.
  6. roll out dough on lightly floured surface, 1/4-1/2 inch thick.
  7. cut out shapes using cookie cutters or free-hand with knife
  8. place 1 inch apart on ungreased, parchment-lined cookie sheet
  9. (if you decide to add sugar, sprinkles, or other decorations, now is the time to do that!) if you plan to use royal icing, bake the cookies first, then frost after they are completely cooled.
  10. bake for 6-10 minutes, depending on thickness of cookie, and desired texture/color of cookie.
  11. remove from oven, and let cool on baking sheet for 5 minutes, then remove to wire rack for remaining cooling.
  12. frost with royal icing.
These sugar cookies make wonderful holiday cookies!
these sugar cookies make wonderful holiday cookies!

AddThis Social Bookmark Button

sometimes it’s all about events…

October 5th, 2019 thecookieblogger Posted in daily cookie diary Comments Off on sometimes it’s all about events…

y’all know i’m a cookie baker and couldn’t imagine life without an apron, some cookie sheets and enough flour so i’m never without! but did you also know i sometimes trade in my apron for an event planner superhero cape? yep, i’ve been planning events for years, mostly for non-profit arts organizations. i help the non-profit team create a fabulous atmosphere, keep the chairs and honorees happy, and help the organization’s raise lots of money. and i love doing it.

most recently, i worked with an incredible team at the 5th avenue theatre here in seattle, to make their dreams of a western-themed event a reality. there were hay bales and cafe lights, lots of red bandanas, sheriff badges, and cowboy hats to go around. and more than 300 people joined in the fun as they line-danced during cocktails, and sang along with the performers during the dinner and show. it was a fun and successful night, and it’s so fulfilling to watch it all come together.

unfortunately, during event time, cookie baking shrinks to a minimum, as there’s just not enough time for a regular human like me to do both! so, for all of you cookie bakers out there missing my posts, know that i’ll be back at it soon. in the meantime, why not put together you’re own western evening? here’s some things that turn a regular party into a ‘wow’ event!

need cowboy hats for your guests?

what about clipping on some sheriff badges for those special guests or the birthday honcho?

nothing fancies up the dinner table better than some homemade placecards. i used these kraft cards, easily printed on my home laser printer, and added some stickers to ‘fun them up’ a bit!

kraft placecards: https://amzn.to/2NV7CEx

think some bandanas can help? why, yes! yes, they will! get them to hand out to guests to wear, as well as consider using them as napkins! they add color and splash to your table and your guests!

yee-haw! hope your western-themed party is as fun as ours was!

and now, bake to our regular cookie baking…

AddThis Social Bookmark Button

delectable almond brittle cookies

November 22nd, 2018 thecookieblogger Posted in daily cookie diary Comments Off on delectable almond brittle cookies

almond brittle is a popular candy, especially around the holidays, but why not try a cookie version of this, and add it to your baking repertoire throughout the holidays? it’s certainly a crowd pleaser, and, depending on how large or small you break up the pieces, you can get a lot of goodness to spread around.

almond brittle cookies

ingredients
for the base of the cookie:
1 cup salted butter, softened
1 cup sugar
1/2 tsp salt
2 tablespoons orange zest
1 large egg plus 1 egg yolk
2 tablespoons whole milk
2 1/2 teaspoons vanilla
3 1/2 cups flour

For the almond brittle topping:
½ cup seedless jam (i used apricot with this recipe, but peach or raspberry work equally well.)
9 tablespoons butter
½ cup plus 1 tablespoon sugar
¼ teaspoon salt
2 tablespoons honey
1/4 cup heavy cream
1 tsp. vanilla
¼ tsp. fresh lemon juice
8 oz. sliced almonds

instructions to make the cookie base:
1. cream the butter and sugar with the salt and zest until the mixture is light and fluffy.
2. beat in the egg, milk and vanilla.
3.add the flour slowly, incorporating it completely into the dough.
4. with your floured hands, roll the dough into a ball, wrap in plastic wrap, and chill for 2 hours.
5. let dough soften slightly before rolling out.

instructions to make the cookies:

1. after letting the dough soften slightly, roll out the cookie dough on parchment paper to fit a 10 inch by 15 inch rectangle.
2. transfer the dough, still on the parchment to a cookie sheet with edged sides.
3. chill the rolled dough for another 20 minutes.
4. preheat the oven to 400 degrees.
5. trim the dough so it fits into the rectangular cookie sheet.
6. make fork pricks all over the dough, and place in oven.
7. bake until lightly golden, about 15-17 minutes. (while baking, make sure to keep an eye on the oven to deflate any bubbles that erupt in the dough (just stick your fork in the bubble!)
8. remove the partially baked cookie base from the oven (but leave the oven on.)
9. place your jam in a small saucepan atop the stove. Warm the jam until it becomes easily spreadable.
10. remove from heat and brush the jam over the cookie base.
11. in a clean saucepan, melt the butter. then add the sugar, salt and honey to the butter and simmer slowly over low heat until the sugar has dissolved. 12. add the cream and raise the heat to medium and bring mixture to a boil. the mixture will thicken after a few minutes (3-4 minutes.)
13. remove from heat and mix in the vanilla, lemon juice and almonds.
14. pour the almond mixture over the jam-covered cookie, using an offset spatula to spread it evenly.
15. bake at 400 degrees for about 14-16 minutes, rotating the cookie tray midway through, until the top is bubbling.
16. cool cookies completely in pan. using a very sharp knife or pizzal cutter, cut the cookies into ragged pieces (or squares, if you want them to look neater!)
17. enjoy!

AddThis Social Bookmark Button

oatmeal cookie recipe = perfect summertime munching

July 7th, 2018 thecookieblogger Posted in daily cookie diary Comments Off on oatmeal cookie recipe = perfect summertime munching

it wouldn’t be summer without munching on a freshly-made oatmeal cookie, served alongside a tall glass of lemonade. i make these pretty regularly, and they are one of my most requested cookie recipes.

thin oatmeal cookies
http://www.thecookieblogger.com/cooks-illustrated-thin-crispy-oatmeal-cookies/

this recipe is direct from america’s test kitchen. I can honestly declare that they have never, ever steered me wrong with their recipes. maybe it’s their intense testing practices. maybe it’s because their new england kitchens are filled with magic. whatever the reason, you can’t go wrong with cookies originally developed by atk.

that being said, i’ve decided to challenge myself over the coming months, to crawl through atk’s the perfect cookie cookbook, and get through all of its recipes between now and the winter holiday season. partly to find some inspiration for my holiday cookie trays, and partly because i do love a good challenge. i’ll post results here on the site and let you know how i’m making out over the next few months. please, stick around to share my successes – and not-so-successes, and perhaps find a little inspiration yourself!

happy cookie baking!

AddThis Social Bookmark Button

oh, those mini muffins!

May 13th, 2018 thecookieblogger Posted in daily cookie diary Comments Off on oh, those mini muffins!

yep, those banana chocolate chip mini muffins are one of my most requested baked goods. people love them. and when i say people, i mean my hubby. because he actually gets pretty delighted when he sees those bananas on the kitchen counter starting to turn all brown and ugly-looking. because it means that those mini muffins can’t be too far off!

i’ve found that organic bananas seem to take a bit longer to get brown and smooshy, which is really where you need them for this recipe. so i often will place them in a brown paper bag, just to speed up the process a bit. it really works – give it a try.

another way to get the bananas just the way you need them? check in with your local grocer! it’s likely they have bananas that have ‘passed their prime’ and are too brown to be out on display. they will happily give them to you at a discounted price. and you’ll have bananas in exactly the perfect state for this recipe!

check out this tried and true recipe for banana chocolate chip mini muffins. it’s an oldie, but definitely a goodie!

http://www.thecookieblogger.com/banana-chocolate-chip-mini-muffins

AddThis Social Bookmark Button

eggnog cookies

December 12th, 2017 thecookieblogger Posted in daily cookie diary Comments Off on eggnog cookies

who doesn’t love the taste of eggnog? well, lots of people, from what i’m told! but to me, eggnog signifies that the holidays are officially on their way. i’m the only one in our house that drinks the stuff, and even when i buy the smallest container i can, i try not to down the whole quart in one sitting.

now, i actually have found a way to re-purpose some of that eggnog so i don’t have to apply it directly to my thighs. it’s a great add-in flavor for holiday cookies! and i actually sprinkle a tiny bit of sifted nutmeg atop the cookies to finish off that holiday scent.

these are cutout cookies, so be sure to have your cookie cutters ready to go. and i used a simple royal icing on them for decoration. for those adventurous bakers in the group, see my second photo. instead of my white drizzle and sifted nutmeg, i went with a marble effect of white, red and green royal frosting as an experiment. not my usual style, but sometimes you just gotta be adventurous in cookieland, no? and special thanks to a cookie decorating workshop at sur la table for the frosting ideas!

eggnog cookies


ingredients:

1/2 cup unsalted butter, softened to room temperature

1 cup granulated sugar

2 large eggs

2 tablespoons, plus 2 teaspoons of eggnog (use the full fat version for the best dough consistency)

1 1/2 cups all-purpose flour

1/2 teaspoon finely ground sea salt

1/4 teaspoon baking soda

1/4 teaspoon finely ground nutmeg

flour for rolling

royal icing for drizzle

sifted nutmeg for light dusting


instructions:

  1. in your mixing bowl, cream the butter and sugar until light and fluffy, about 4 minutes.
  2. beat in eggs, one at a time.
  3. beat in the eggnog until it is well combined.
  4. add the flour, salt, baking soda and nutmeg to the creamed mixture, and mix on lowest speed until well-combined.
  5. cover and refrigerate overnight to firm up dough for easy handling.
  6. preheat oven to 375 degrees. line your baking sheets with parchment paper.
  7. lightly dust your rolling area with additional flour. roll dough to 1/8″ thickness, and using your cookie cutters, cut our your desired shapes.
  8. transfer your cutout cookies to the parchment-lined baking sheets, about 1 1/2″ apart, leaving some room to spread slightly.
  9. place in oven and bake for 10 minutes, or just until edges begin to brown. remove cookies from sheet and let cool on wire rack.
  10. when cookies are completely cool, drizzle icing atop the cookie, and prior to the drizzle drying, lightly sprinkle sifted nutmeg atop cookies.
  11. enjoy!

<yield: about 40 cookies>


AddThis Social Bookmark Button

honey pillows

December 10th, 2017 thecookieblogger Posted in daily cookie diary Comments Off on honey pillows

these light and tasty cookies are close cousins to the ever-popular snickerdoodles. but instead of that crispy crunch of a snickerdoodle, these honey-sweetened delights are soft and airy. the dough itself is quite soft, so it’s best to use a small scoop to set them on your parchment-lined baking sheet – that will be much easier than trying to roll them between your palms. and just a sprinkle of cinnamon sugar (or in my case, i used king arthur flour’s cinnamon sugar plus, which is *awe-some*!) adds some terrific flavor!

also, i am a big fan of purchasing and using local honey, especially with its health benefits in helping build up allergy immunities. and in this case, i used one of my favorite local honeys (the honey hole honey company), with their beekeeper and his hives being only 2 blocks from my home! can’t get much more local than that!

honey pillows

ingredients:

1/3 cup unsalted butter, softened to room temperature

2/3 cup honey

3/4 teaspoon baking soda

1/2 teaspoon cream of tartar

1/4 teaspoon salt

1 large egg

1 1/2 cups all-purpose flour

1 1/2 tablespoons cinnamon sugar plus (or make your own 1 1/2 tablespoon baker’s sugar combined with 1/2 teaspoon ground vietnamese cinnamon

instructions:

1. preheat oven to 375 degrees. line baking sheets with parchment paper.

2. in your large mixing bowl on medium speed, beat butter for about 1 minute.

3. add the honey, baking soda, cream of tartar, and salt, beating at medium speed until well combined. be sure to scrape the bowl from time to time.

4. add the large egg, beating until well combined.

5. turn off your mixer, add the flour to the wet ingredients, and begin on low speed, combining the flour until it is just combined and there are no dry ingredients visible in the bowl. don’t be tempted to overmix!

6. with a small teaspoon scoop, drop dough 2 inches apart onto your parchment-lined baking sheet.

7. sprinkle each mound of dough with cinnamon sugar.

8. bake for 8-9 minutes until edges are just starting to firm up.

9. remove from oven, letting cookies stay on baking sheet for about 1 more minute. then remove cookies to wire rack for complete cooling.

10. enjoy!

<yield: 34 cookies>

AddThis Social Bookmark Button

red velvet spritzies

December 9th, 2017 thecookieblogger Posted in daily cookie diary Comments Off on red velvet spritzies

red velvet cake doesn’t seem to be as popular a cake nowadays as when i was young. i remember having non-italian friends who always requested it for their birthday cakes (seriously, us italian kids loved rum-soaked sponge layer cakes with whipped buttercream and sprinkles or toasted almonds around the outside!)

a few years ago, i spotted this spritz cookie recipe and couldn’t resist. the color was perfect, and though this photo looks darker and more like chocolate cookies, they really are a deep red with hints of cocoa in the color. their texture is traditional spritz and their flavor is gentle – not too sugary, just enough buttery flavor to make them rich, yet light.

the nonpareils on top add a little crunch along with a festive look. and though it’s a bit late tonight, in the morning i may dip the bottom of these cookies in a melted rich dark chocolate glaze. i’ll let you know if i do (and i’ll upload a photo, because we all know it didn’t happen unless there’s a photo to go along with it, right?) (**editor’s note: i did dip and the cookies are even more perfect now! see the photo on the right for dipped versions!)

give these a try and let me know what you think. frankly, they’re easy to bake and i think you’ll be pleasantly surprised!

red velvet spritzies


ingredients:

1 cup unsalted butter, softened to room temperature
3 oz. cream cheese, softened to room temperature (use the full-fat cream cheese)
1 cup granulated sugar
1 large egg, separated yolk from whites
1 teaspoon vanilla extract
1 teaspoon red paste food coloring
1 1/2 cups all-purpose flour
1 tablespoon dark cocoa powder
1 tablespoon water
white nonpareils

instructions:

1. preheat oven to 350 degrees. do not grease or add parchment paper to your baking sheets. spritz cookies bake better on plain baking sheets.
2. cream butter, cream cheese and sugar until light and fluffy.
3. add egg yolk, vanilla, and food coloring to the buttery mixture. beat until completely combined.
4. add flour and cocoa, adding slowly into the butter mixture at low to medium speed on your mixer.
5. using a cookie press fitted with a flower disk (or whichever disk you wish!), press dough approximately 1″ apart onto the baking sheets. (these cookies don’t spread, so they can be fairly close together)
6. in a small bowl, combine the egg white and the water, and using a pastry brush, lightly brush over each cookies. be careful not to place too much egg white mixture on the cookies, and don’t let it drip down onto your baking sheet, as that may cause the cookies to stick to the sheet.
7. sprinkle the nonpareils lightly atop each cookie.
8. bake for 10-12 minutes until the cookies are just set, but not brown.
9. remove from oven. cool for 2 minutes on the baking sheets, then remove cookies from pan and cool completely on wire racks.
10. enjoy!

AddThis Social Bookmark Button

classic sugar cookies

December 7th, 2017 thecookieblogger Posted in daily cookie diary Comments Off on classic sugar cookies

are you looking for a traditional sugar cookie that’s easy to make with the kids? these cookies are easy to bake, and the perfect palette for your decorating magic!

yesterday, i visited a nearby sur la table store, which thankfully for my pocketbook, isn’t too nearby! i love everything this store sells, but i am especially drawn to their regularly-scheduled cooking and baking classes. if you have one of these stores nearby, i urge you to take a look at their class schedule and sign up for one. you will not be disappointed.

well, yesterday’s workshop was all about decorating holiday cookies. chef marianna was a whiz at giving us all the ins-and-outs of royal icing, which, up til yesterday, truly evaded me. my baking skills are pretty darn good, but my decorating skills? they leave a bit to be desired. but after three speedy hours in the kitchen with chef marianna and my fellow bakers, i am feeling optimistic about this year’s decorated sugar cookies!

for today, let’s bake up some sugar cookies. and then break out the royal icing (or the store-bought stuff) – this is all about having some fun!

and special thanks to chef marianna and sur la table for this great recipe – and for an awesome class!

classic sugar cookies

ingredients:

3 cups all-purpose flour, plus a bit more for rolling

3/4 teaspoon baking powder

1/4 teaspoon salt

8 ounces (2 sticks) unsalted butter at room temperature

1 1/4 cups granulated sugar

2 large eggs

1 tablespoon vanilla bean paste

instructions:

  1. in the bowl of your stand mixer, using the paddle attachment, beat the butter and sugar until light and fluffy, about 4 minutes.
  2. add the eggs, one at a time, mixing until well blended, scraping down the sides of the bowl as needed.
  3. Add vanilla bean paste and mix for 30 seconds.
  4. turn machine off and add the flour, baking powder and salt. on very low speed, beat the dough, continuing to scrape the sides of the bowl as needed.
  5. divide dough into two circles and wrap in plastic wrap, refrigerating until chilled and firm, at least one hour.
  6. when you’re ready to bake the cookies, preheat your oven to 350 degrees, and line your baking sheets with parchment paper.
  7. roll the dough on a lightly floured surface. the dough should be approximately 1/4″ thick. cut out shapes with your cookie cutters. carefully transfer the cookies onto your baking sheets, leaving about 1″ between each cookie (i will sometimes use an offset spatula to help me move the cookies from cutting surface to baking sheet.)
  8. bake approximately 8-10 minutes, rotating the baking sheets midway through. remove the baking sheets from the oven when the cookies are pale, but set. transfer cookies to a wire rack for cooling.
  9. cool completely before decorating. (cookies can be stored in airtight containers for up to one week.)
  10. enjoy!

<yield: approximately 36 cookies>


AddThis Social Bookmark Button

walnut and brown sugar rugelach

December 2nd, 2017 thecookieblogger Posted in daily cookie diary Comments Off on walnut and brown sugar rugelach

oh, i’ve been thinking of making these cookies for awhile. the dough is light and tender, the filling rich and delicious. making rugelach sometimes seems daunting, but don’t let the few extra steps deter you from making these. the cutting and shaping really isn’t more complex than cutting a pizza pie, and doing a quick roll-up of the filled dough really is quick and painless. they are worth the tiny bit of extra effort!

hoping to be a bit more helpful than usual, i’ve added some additional photos today to show you the steps. you’ll see i used a metal ruler – that’s my kitchen ruler! it cleans up well and doesn’t get damaged when i run a knife along its’ edge when cutting the rugelach dough.

walnut and brown sugar rugelach

ingredients:

1 cup unsalted butter, softened to room temperature

8 oz. (1 large package) cream cheese, softened to room temperature (be sure to use full-fat and not reduced-fat cream cheese)

2 tablespoons granulated sugar

1/2 teaspoon salt

2 cups all-purpose flour

1/2 – 1 cup of all-purpose flour (for rolling out dough)

1 large egg

1 teaspoon water

1 cup walnuts, finely chopped

1/2 cup light brown sugar, firmly packed

instructions:

1. in a food processor, blend the butter, cream cheese, granulated sugar and salt until very well combined.

2. add 2 cups flour and pulse just until ingredients come together and dough forms.

3. divide dough in half. flatten into disks and wrap each disc in plastic wrap.

4. refrigerate overnight (or up to 2 days in fridge; 2 months in freezer)

5. preheat oven to 350 degrees. prep baking sheets with parchment paper.

6. in a small bowl, combine the egg and water to create a simple egg wash.

7. on a lightly floured board (or lightly floured parchment paper), roll out one disc of dough into an 11 inch circle. it’s easy to do if you just use a dinner plate as your template. once the dough is rolled out, place the dinner plate on top of the dough, and with a sharp knife, cut a circle, using the dinner plate as your guide. trim scraps (you can use them later to make a smaller circle and some mini rugelach!)


8. brush the circle with the egg wash, then sprinkle walnuts and brown sugar over the egg wash.

9. using a sharp knife or pizza cutter to cut, and using a metal ruler to guide you, cut your circle into 16 equal triangles. start

ing from the wide end, roll up the triangle, placing the seam side down on the prepared baking sheet.

10. brush each rolled triangle with the egg wash.

11. bake until golden brown, approximately 30 minutes.

12. transfer rugelach to wire rack. cool completely.

13. enjoy!

<yield: 40 cookies>

AddThis Social Bookmark Button