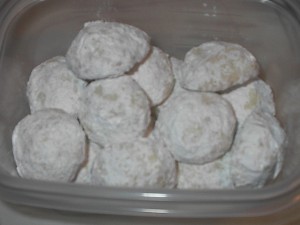
pecan icebox cookies

November 24th, 2008 thecookieblogger Posted in daily cookie diary Comments Off on pecan icebox cookies

a bunch of years ago, i was looking for an easy refrigerator cookie that would work like those slice-n-bake cookies. but of course i wanted a home-baked cookie. i think i found this recipe in some now-long-gone newspaper column, and thought it would fit the bill. i was right – it was perfect. they are delicious, they are very easy to make, and they store well (in unbaked log form) in both the refrigerator (for up to two weeks) or freezer (up to one month).

i also have added these to my christmas cookie tray, because they are light enough to be a good after-dinner cookie, while pretty enough to be part of the cookie tray festivities!


pecan icebox cookies
ingredients:
1 cup unsalted butter, softened
1 cup sugar
1 cup packed brown sugar
3 eggs
4 cups all-purpose flour
2 teaspoons baking powder
1 teaspoon baking soda
1 teaspoon ground cinnamon
1/2 teaspoon salt
1 cup chopped pecans

instructions:
1. in a mixing bowl, cream the butter and sugars.
2. add the eggs, one at a time, beating well after each addition.
3. combine the flour, baking powder, baking soda, cinnamon and salt, and gradually add to the creamed mixture.
4. gently stir in pecans.
5. shape into four 6 1/2″ rolls, wrap each in plastic wrap and refrigerate overnight.
6. when ready to bake, unwrap each roll and slice into 1/8″ thick slices.
7. place 1″ apart on parchment-lined baking sheets.
8. bake at 375 degrees for 7 – 10 minutes or until lightly browned.
9. remove from oven. let cookies rest on baking sheets for 1-2 minutes, then remove to wire racks for complete cooling.
yield: about 9 dozen

AddThis Social Bookmark Button

chewy brownie cookies

November 21st, 2008 thecookieblogger Posted in daily cookie diary Comments Off on chewy brownie cookies

when is a brownie not quite a brownie? why, when it’s in the form of a cookie, of course!

brownies in their traditional bar shapes are plentiful and welcome by most everyone, but sometimes a brownie posing as a cookie can be a good thing. think of it this way, no one needs to fight over who gets the corners. these cookies are a bit crispy on the outside and chewy on the inside, and if you really wanted to be decadent, why not drizzle some chocolate glaze over the top of them after they’ve cooled. they are definitely quite fabulous with or without glaze! and perfect with a nice tall glass of milk. yum.


chewy brownie cookies
ingredients:
2/3 cup (2/3 stick) unflavored crisco
1 1/2 cups firmly packed light brown sugar
1 tablespoon water
1 teaspoon vanilla
2 eggs
1 1/2 cups all-purpose flour
1/3 cup unsweetened baking cocoa
1/4 teaspoon baking soda
1/2 teaspoon salt
2 1/2 cups semi-sweet chocolate chips

instructions:
1. preheat oven to 375 degrees. line baking sheets with parchment paper.
2. combine crisco, brown sugar, water and vanilla in large mixing bowl. beat at medium speed until well-blended. beat eggs into creamed mixture.
3. combine flour, cocoa, baking soda and salt. mix into creamed mixture at low speed just until blended.
4. stir in chocolate chips
5. drop by rounded tablespoonfuls approximately 2″ apart on baking sheet.
6. bake at 375 degrees for 7-9 minutes, or until cookies are set. do not overbake cookies will appear soft and moist.
7. remove from oven. cool 2-3 minutes on baking sheet, then remove to wire rack to complete cooling.
8. enjoy!

AddThis Social Bookmark Button

extraordinary pumpkin bars

November 20th, 2008 thecookieblogger Posted in daily cookie diary Comments Off on extraordinary pumpkin bars

a number of years ago, a co-worker brought these delectable bars into work — and thankfully i was able to snag one before the entire platter was gone in record time. a long-time favorite passed down from her mom to her, she was kind enough to share the recipe with me for these oh-so-moist pumpkin treats. though i’ve included her recipe for frosting, i love these naked — and of course you can always top individual bars with a bit of whipped cream and a very slight sprinkle of cinnamon. can you say ‘delicious?!”

extraordinary pumpkin bars
ingredients:
4 eggs
1 2/3 cups baker’s sugar
1 cup vegetable oil
1 15 oz. can pumpkin
2 cups all-purpose flour
2 teaspoons baking powder
2 teaspoons ground cinnamon
1 teaspoon salt
1 teaspoon baking soda

instructions:
1. preheat oven to 350 degrees.
2. in mixer bowl, beat eggs, sugar, oil and pumpkin until light and fluffy.
3. add flour, baking powder, cinnamon, salt and baking soda to mixture and mix thoroughly.
4. spread batter in ungreased 13 x 9 x 2 baking pan.
5. bake at 350 degrees for 35 – 40 minutes.
6. remove from oven to wire cooling rack. when completely cool, cut into bars and enjoy!

frosting (optional):
ingredients:
2 cups sifted confectioner’s sugar
1 3oz. package cream cheese
1/2 cup unsalted butter
1 teaspoon vanilla

instructions
1. cream together cream cheese and butter.
2. stir in vanilla.
3. add powdered sugar a little at a time, beating well until mixture is smooth.

take note: you can frost the bars while they are uncut and still in the pan – just be sure the pan and bars are completely cool. or you can just serve the bars naked (my favorite!) and just add a dollop of the cream cheese frosting to the top or side of the bar.

AddThis Social Bookmark Button

everybody’s favorite rice krispie treats

November 19th, 2008 thecookieblogger Posted in daily cookie diary Comments Off on everybody’s favorite rice krispie treats

does everyone have a childhood memory of these after-school snacks? well, to be honest, not me. i had never ‘baked’ or even eaten one of these until i was married and started baking snacks for crew load-outs. one of the guys asked me if i would include them in the ‘load-out buffet’ and i started making them from that day forward. they are easy with no baking required (only stovetop necessary), and they seem to go over well with school bake sales, stagehand gatherings and visits by 6 year old neighbors!


rice krispie treats
ingredients
3 tablespoons butter
1 10 oz. package (about 40 large) regular marshmallows (or 4 cups of mini marshmallows)
6 cups rice krispies

directions
1. coat a 13 x 9 x 2 with cooking spray (or butter)
2. melt the butter in a large, heavy saucepan over low heat.
3. add marshmallows and continuously stir until the marshmallows are completely melted. remove from heat.
4. stir in the rice krispies until all the krispies are well coated.
5. using buttered waxed paper, press the marshmallow krispies mixture into the pan. let cool in pan. once cool, cut into squares and serve.
6. enjoy!
yield: about 24 squares

take note: i find when pressing the mixture into the pan, you can wet your fingertips and press with wet fingertips, and it’s much easier to get it compacted in the pan! also, these treats taste best the day they’re made!

AddThis Social Bookmark Button

triple threat chocolate thumbprint cookies

November 18th, 2008 thecookieblogger Posted in daily cookie diary Comments Off on triple threat chocolate thumbprint cookies

if you’re after a good fix of chocolate, well, cookie lover, this is the recipe for you! a cocoa dough, studded with mini chocolate chips and filled with a rich dark chocolate ganache in the center. some may say that’s too much chocolate in one cookie. okay, you are right! no one would say you could ever have too much chocolate in one cookie!


the best part of these cookies is that in addition to being absolutely delicious, they are beautiful in their presentation, so they work well on dessert buffet tables and cookie trays! make sure you let that ganache dry completely before you stack them! (sometimes a quick field trip to the refrigerator is just what that ganache filling needs to set!)

triple threat chocolate thumbprint cookies
ingredients
1 cup (2 sticks) unsalted butter, softened
2/3 cup baker’s sugar
1 large egg
1 teaspoon vanilla extract
2 cups all-purpose flour
3 tablespoons unsweetened cocoa powder
1/4 teaspoon salt
1 cup semisweet mini-chocolate chips

directions
1. preheat oven to 350 degrees. line baking sheets with parchment paper.
2. beat the butter and sugar in your stand mixer until smooth, creamy and a bit lighter in color.
3. add the egg and vanilla and beat until well-blended.
4. with mixer on low speed, add the flour, cocoa and salt just until blended. do not overmix.
5. stir in the mini chocolate chips (the dough will feel stiff)
6. using a zeroll 40 scoop (or generous tablespoon), scoop the dough and roll into a ball. place each cookie ball about 2 inches apart on your prepared cookie sheets. with your thumb, or with the tip of a large-handled wooden spoon, make an indent into the center of each cookie.
7. bake each sheet, one batch at a time, for 12-15 minutes. the cookies will be firm, but be careful not to overbake. remove from the oven and let cool on baking sheet for 3-4 minutes.
8. remove from baking sheet and let cool on wire cooling rack.

For the ganache filling:
ingredients:
8 ounces (8 squares) bittersweet chocolate
1 cup whipping cream

instructions:
1. over low heat, melt the chocolate in a heavy duty pan, stirring continually.
2. when the chocolate is just about melted, remove from the heat, and set aside to let cool a bit.
3. stir occasionally as the chocolate is cooling. when it is cool but still liquid consistency, add whipping cream and mix thoroughly. at first it will appear that the cream is resistant to mix with the chocolate, but with a good wooden spoon and a little elbow grease, it will blend well.
4. once blended, let it sit a few minutes to thicken up a bit, then spoon the ganache filling into each cookie. you can use a pastry bag, or simply spoon it in to the indentation.
5. let cookies sit on tray or rack until ganache has hardened. you can speed up this process by placing them in the refrigerator for a short time.
enjoy!
yield: approximately 45 – 50 cookies

AddThis Social Bookmark Button

cook’s illustrated thin & crispy oatmeal cookies

November 17th, 2008 thecookieblogger Posted in daily cookie diary Comments Off on cook’s illustrated thin & crispy oatmeal cookies

well, dear cookie lovers, these oatmeal cookies are utter perfection. if you are a thin and crispy oatmeal cookie lover, these are for you! and if you are like me and prefer your cookies soft and chewy, well, these are still for you! i have never had a more delicious crunchy cookie overtake my desire for soft and chewy until now. why not try a batch to include with this year’s thanksgiving desserts — they really are quite something! and they travel well too, if they are well-wrapped! send off some to your favorite oatmeal cookie lover!

this cookie was featured in the january – february, 2008 issue of cook’s illustrated, which beyond a doubt is one of the best food-related magazines on the market today. that they do all the research for us is just one of their outstanding attributes — their true appeal is that they provide excellent recipes for food real people eat! if you haven’t read an issue recently, perhaps you should ask santa to bring you a subscription!


cook’s illustrated thin and crispy oatmeal cookies
ingredients:
1 cup (5 ounces) unbleached all-purpose flour
3/4 teaspoon baking powder
1/2 teaspoon baking soda
1/2 teaspoon table salt
14 tablespoons 1 3/4 sticks) unsalted butter, softened but still cool, about 65 degrees
1 cup (7 ounces) granulated sugar (I use baker’s sugar)
1/4 cup (1 3/4 ounces) packed light brown sugar
1 large egg
1 teaspoon vanilla extract
2 1/2 cups old-fashioned rolled oats (must be old-fashioned, not quick-cooking)

instructions:
1. adjust oven rack to middle position and heat oven to 350 degrees. line 3 large (18- by 12- inch) baking sheets with parchment paper. Whisk flour, baking powder, baking soda and salt in a medium bowl.
2. in standing mixer fitted with paddle attachment, beat butter and sugars at medium-low speed until just combined, about 20 seconds. increase speed to medium and continue to beat until light and fluffy, about 1 minute longer. scrape down bowl with rubber spatula. add egg and vanilla and beat on medium-low until fully incorporated, about 30 seconds. scrape down bowl again. with mixer running at low speed, add flour mixture until just incorporated and smooth, 10 seconds. with mixer still running on low, gradually add oats and mix until well-incorporated, 20 seconds. give dough final stir with rubber spatula to ensure that no flour pockets remain and ingredients are evenly distributed.
3. divide dough into 24 equal portions, each about 2 tablespoons (or use a #30 cookie scoop), then roll between palms into balls. place cookies on prepared baking sheets, spacing them about 2 1/2 inches apart, 8 dough balls per sheet. ssing fingertips, gently press each dough ball to 3/4-inch thickness.
4. bake 1 sheet at a time until cookies are deep golden brown, edges are crisp, and centers yield to slight pressure when pressed, 13 – 16 minutes, rotating baking sheet halfway through. transfer baking sheet to wire rack; cool cookies completely on sheet.
yield: 24 cookies.

AddThis Social Bookmark Button

“it’s almost winter” almond snowballs

November 16th, 2008 thecookieblogger Posted in daily cookie diary Comments Off on “it’s almost winter” almond snowballs

well, when i looked out my kitchen window this morning, i could see that mountain in the distance, and noticed a new addition to that spectacular vista. is it latte foam steaming off the top of that mountain? um, no. but, in fact, that very peak is topped with a fresh coating of snow! with its proud white cap, the mountain is reminding me that winter can’t be too far along, and i’d best hunt down my car window scraper and my favorite l.l.bean gloves, because the chill is on its way!

…and there’s no better cookie to remind me of snow and winter — and the fact that there’s only about one month before the crazed holiday baking trays will be topped off with these snowy white peaks of delicate goodness. so, to get you in the mood, and to get you thinking about all that holiday baking coming your way, here’s an old family favorite — one that has graced our holiday table since i was born! my family knows them as almond snowballs, but you may remember them as mexican wedding cookies or russian teacakes. whatever the name, they truly are scrumptious!

almondsnow

almond snowballs
ingredients:
1 cup butter softened
1/2 cup sifted confectioner’s sugar
1 tsp. vanilla
2 cups sifted all-purpose flour
1 tsp. salt
2 tsps. almond extract
1 cup sifted confectioner’s sugar for rolling

instructions
1. preheat oven to 350 degrees.
2. cream butter in large bowl until light and fluffy.
3. add sugar, vanilla extract and almond extract.
4. sift in flour and salt.
5. shape into balls the size of walnuts.
6. place on parchment lined cookie sheets and bake in 350 degree oven for about 15 minutes.
7. remove from cookie sheet and immediately roll in confectioner’s sugar. cool, then roll in confectioner’s sugar again.
8. enjoy!

AddThis Social Bookmark Button

lovely browned butter cookies

November 15th, 2008 thecookieblogger Posted in daily cookie diary Comments Off on lovely browned butter cookies

some of you may know of my quest to duplicate my all-time favorite cookie in the universe — conti’s chocolate sprinkle cookies. a staple growing up at every holiday meal, these cookies were as much a part of family tradition as my mom’s manicotti or my grandma’s stuffed artichokes. anyway, living 3000 miles from the nearest bronx italian pastry shop has forced this cookie girl to try to make her own version of this buttery, sandy-textured cookie. and though i have tried many, many recipe variations, i am still hot on the trail of this sadly-missed cookie.

one such recipe that held promise was this browned butter cookie. it sounded promising, but alas, did not resemble the much-beloved cookie at all. that being said, however, this cookie is quite delicious in its own right — the nutty flavor of the browned butter gives this cookie a nice richness that is often missing from basic butter cookies. though it’s not the cookie i was searching for, it certainly will be a ‘keeper’ in my cookie recipe box!

lovely browned butter cookies
ingredients:
1 1/2 cups unsalted butter
2 cups packed light brown sugar
2 eggs
2 teaspoons vanilla extract
1 teaspoon baking soda
1/2 teaspoon baking powder
1/2 teaspoon salt
3 cups all-purpose flour

instructions
1. preheat oven to 350 degrees. line cookie sheets with parchment paper.
2. heat butter over medium heat for 5-10 minutes until it turns brown in color. stir frequently, and use a light-colored pan if you are new to browning butter — it goes from nice nut-colored brown to burnt very easily, so you really need to keep an eye on this. remove from heat and let cool slightly.
3. pour browned butter into bowl of stand mixer. beat butter with the brown sugar until butter is completely cooled.
4. mix in eggs, vanilla, baking soda, baking powder and salt. mix well.
5. mix in flour until incorporated. do not overmix.
6. drop by tablespoons onto parchment lined cookie sheets.
7. bake for approximately 10 minutes until cookies are light brown around the edges.
8. remove from oven. let rest on cookie sheet for 1-2 minutes, then remove to wire cooling rack.
9. enjoy!
yield: approximately 50 cookies

variations on this recipe: feel free to add 2/3 cup chopped pecans or walnuts to this recipe to make it a nutty cookie! or feel free to dip the edge of this cookie into a dark chocolate coating to dress it up a bit! or why not do both?!

AddThis Social Bookmark Button

chocolate peanut butter chunkers

November 14th, 2008 thecookieblogger Posted in daily cookie diary Comments Off on chocolate peanut butter chunkers

today, you will need to practice restraint. why, you may ask? because these cookies are outstanding. peanut butter cups in cookie form. and they just shout out “eat me!” i know. i’ve been hearing the shouting all morning, and they really are hard to resist! for chocolate lovers and peanut butter lovers alike, i think you will find these well-received – and you’ll find a very empty cookie jar in only a matter of minutes!

chocolate peanut butter chunkers
ingredients:
1 cup all-purpose flour
1/2 teaspoon baking soda
1/8 teaspoon salt
1/2 stick unsalted butter at room temperature
1/4 cup (4 tablespoons) solid vegetable shortening (i use unflavored crisco)
1/4 cup smooth peanut butter (do not use all-natural peanut butter)
1/2 cup packed light brown sugar
1/3 cup baker’s sugar
1 egg
1 1/2 teaspoon vanilla extract
2 1/2 cups of peanut butter cups, cut up into small to medium-sized pieces

instructions
1. preheat oven to 325 degrees. line cookies sheets with parchment paper.
2. using a stand mixer, cream the butter, vegetable oil, peanut butter and both sugars until smoothly blended and lighter in color.
3. add the egg and vanilla. continue to mix until just blended.
4. sift in the flour, baking soda and salt, and then mix at low speed just until blended. do not overmix. the dough will seem soft.
5. add peanut butter cup pieces, mixing gently with a spoon or spatula.
6. using your #50 cookie scoop (about 3 tablespoons) drop onto prepared cookie sheets about 3 inches apart (they will spread a bit).
7. bake for about 16-18 minutes — the cookie tops will have some small cracks and should feel somewhat firm.
8. remove from oven. let the cookies rest on the cookie sheet for 5-6 minutes, then remove cookies to wire cooling rack.
9. enjoy!

yield: about 20 – 22 cookies.

AddThis Social Bookmark Button

absolutely yummy ginger snappers

November 13th, 2008 thecookieblogger Posted in daily cookie diary Comments Off on absolutely yummy ginger snappers

with the november winds blowing, the leaves swirling, and the scent of my neighbor’s wood-burning stove filling the air, i’m craving a cookie that shouts out ‘autumn’ — and to me, that’s anything with a little ginger in it! there’s something familiar and cozy about the taste of ginger, a kind of homey goodness. i even remember the taste of ginger ale making me feel better on those rare occasions when i had the flu as a child…

that being said, the ultimate in ginger cookies would have to be ginger snaps. they are perfectly flavorful, with just the right amount of ‘bite’ to them. both kids and adults enjoy their munchy goodness, and crumbled, they make an excellent ice cream topping or pie crust!


this recipe is based on one i found in sweet maria’s cookie jar cookbook by maria bruscino sanchez. if you’ve read my past blog entries, you’ll see that maria is one of my cookie heroes! i love her cookbooks, her writing style, and mostly her cookies. and though i discovered maria’s books while researching some recipes of my ancestral italian cookies, i’ve discovered that her repertoire exceeds far beyond italian recipes! this recipe is based on her classic gingersnap cookie – her original recipe can be found in the above-mentioned cookbook! enjoy!

ginger snappers
ingredients:
2/3 cup vegetable oil
1 cup baker’s sugar
1 large egg
1/3 cup molasses
1 1/2 cups all-purpose flour
1 1/4 teaspoon cinnamon
1 1/4 teaspoon ginger
1 teaspoon salt
2 teaspoons baking soda
1 teaspoon cream of tartar
granulated sugar for rolling cookies

instructions:
1. preheat oven to 350 degrees. line cookie sheet with parchment paper.
2. using your stand mixer, beat oil and sugar at medium speed.
3. add egg and molasses. beat until well mixed.
4. in separate bowl, add flour, cinnamon, ginger, salt, baking soda and cream of tartar. add while mixer is on low speed. mix just until blended — do not overmix.
5. using a teaspoon scoop, scoop dough and roll into a ball. roll into the additional granulated sugar. place on cookie sheet, spacing about 2 inches apart (they will spread a bit!)
6. bake approximately 13-14 minutes until they are a nice golden color.
7. remove cookie sheet from oven. let rest on cookie sheet for about 2 minutes. remove from sheet and place on wire rack to cool.
8. enjoy!
yield: about 25 cookies.

AddThis Social Bookmark Button