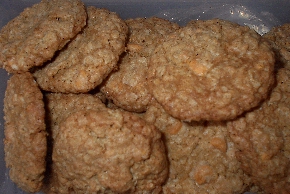
all-american cowgirl cookies

November 12th, 2008 thecookieblogger Posted in daily cookie diary Comments Off on all-american cowgirl cookies

today we have my version of the perennial favorite cowboy cookies. frankly, i’ve chosen to call them cowgirl cookies because it’s my cookie blog and i’ll do what i please. okay, that’s not really the reason, but suddenly i had the urge to assert myself!

the real reason for their female gender name is because the oats make them strong and hardy, while the combination of chocolate chunks and butterscotch chips give them a sweet edge — and i’d say the combo of sweet and strong says cowgirl to me! whatever you call them, they are tasty, filling and a real crowd-pleaser.


all-american cowgirl cookies
ingredients:
2 cups all-purpose flour
2 cups old-fashioned oats
1 tsp. baking soda
1/2 tsp. baking powder
1/2 tsp. finely ground sea salt
1 cup (2 sticks) unsalted butter, room temp.
3/4 cups baker’s sugar
3/4 cup plus 2 tbsp. packed dark brown sugar
2 large eggs
1 tsp. vanilla extract
1 1/2 cups semisweet chocolate chunks
1 cup chopped toasted walnuts (about 4 ozs.), cooled
3/4 cup butterscotch chips

instructions:
1. preheat oven to 350 degrees.
2. whisk 1st 5 ingredients in medium bowl to blend; set aside.
3. beat butter and sugars with mixer until light and fluffy.
4. add eggs and vanilla. mix completely.
5. add dry ingredients, mixing until just blended.
6. stir in chocolate chunks, butterscotch chips and cooled toasted walnuts.
7. cover dough and chill in refrigerator at least one hour.
8. with tablespoon scoop, placed dough on parchment lined baking sheets. bake 8-10 minutes until cookies are golden brown around the edges and just firm in center.
9. transfer to cooling racks immediately.
enjoy!

yield: approximately 36-40 cookies.

AddThis Social Bookmark Button

coffee and chip chunkers

November 11th, 2008 thecookieblogger Posted in daily cookie diary Comments Off on coffee and chip chunkers

until recently, i really wasn’t a big coffee drinker. but lately, i find a cup of green mountain breakfast blend hits the spot – it’s quite yummy! i know out here in seattle, coffee is quite a dominant force, and it’s not surprising that coffee plays a prominent role in the repertoire of local bakers.

one such recipe is today’s cookie. it’s thick and hearty, with a mild coffee flavor that complements but doesn’t overpower the chocolate chips and the toasted pecans. and forgive me for being biased, but i do believe this is an adult cookie — though the coffee flavor is quite mild, it still seems to be more of an adult favorite!

and did i mention they look quite beautiful, and they smell positively dee-lish when they’re baking!

these are best eaten on day one, because they do tend to get very hard the next day, no matter how you store them. but do not fret, if you freeze some fresh from the cooling rack, i think you will be pleasantly surprised by how fresh they taste when you defrost them!

coffee and chip chunkers
ingredients:
1/2 cup (1 stick) butter, softened
1 cup light brown sugar, packed
1/4 cup baker’s sugar
1 egg, room temperature
1 3/4 cups all-purpose flour
1/2 tsp. baking soda
1/2 tsp. baking powder
1/2 tsp. salt
1 3/4 tsp. instant coffee
1 1/2 cups semi-sweet chocolate chips
1/2 cup chopped pecans, lightly toasted

instructions:
1. preheat oven to 375 degrees. line cookie sheets with parchment paper.
2. cream butter and both brown and white sugars until fluffy and light.
3. beat in egg and vanilla.
4. sift flour, baking soda, baking powder and salt into wet ingredients with a wooden spoon until they are completely blended.
5. stir in instant coffee, chocolate chips and toasted, chopped pecans.
6. drop by tablespoons on the lined cookie sheets (leave about 1″ between each scoop)
7. bake for 11 minutes till cookies are somewhat golden and crisp on bottom.
8. remove from oven. allow to cool for 3-4 minutes on cookie sheet, then transfer to wire cooling rack until completely cooled.
9. enjoy!

yield: about 20 generous-sized cookies

AddThis Social Bookmark Button

oatmeal scotcheroos

November 10th, 2008 thecookieblogger Posted in daily cookie diary Comments Off on oatmeal scotcheroos

when i was young, i loved my-t-fine butterscotch pudding. it was one of those treats that really ‘hit the spot’, especially on cool autumn days. as an adult, i’ve revisited that butterscotch pudding when i’ve been with family in new york, and it’s just not the same. nowadays, it’s too sweet and has a bit of a metallic taste, so it’s another case where i should have left my food memories alone. but loving the taste of butterscotch, i longed to find a cookie that could incorporate the flavor, yet not be too sweet. this oatmeal scotcheroo cookie uses those nestle toll house butterscotch flavored morsels, which when eaten out of the bag are way too strong, but when mixed in a cookie batter and baked, tone down a bit to add just the right amount of butterscotch and just the right amount of sweetness to a perfectly delightful oatmeal cookie.


oatscotch

for a bit of variety and an added texture, feel free to add 1/2 cup of toasted and chopped walnut pieces to the batter. these will be a hit with young and old alike!

oatmeal scotcheroos
ingredients:
1 1/4 cups all-purpose unbleached flour
1 teaspoon baking soda
1/2 teaspoon ground cinnamon
1/2 teaspoon salt
1 cup (2 sticks) unsalted butter, softened
3/4 cup granulated baker’s sugar
3/4 cup packed light brown sugar
1 1/2 teaspoon vanilla extract
3 cups quick or old-fashioned oats
1 11oz. package (approximately 1 2/3 cups) butterscotch flavored morsels

instructions:
1. preheat oven to 350 degrees.
2. combine flour, baking soda, cinnamon and salt in a small bowl and set aside.
3. beat butter, sugars, eggs and extract in a large mixing bowl until soft and fluffy.
4. gradually add flour mixture.
5. stir in oats and morsels just until mixed. do not overmix.
6. drop by rounded tablespoons onto parchment-lined cookie sheets.
7. bake for 7-8 minutes – cookie will be chewy. (if you want crispy cookies, bake 9-10 minutes)
8. cool on baking sheet for 1-2 minutes then remove to wire racks to cool completely.
enjoy!

yield: makes about 3 1/2 dozen cookies.

AddThis Social Bookmark Button

fine & sandy peanut butter cookies

November 9th, 2008 thecookieblogger Posted in daily cookie diary Comments Off on fine & sandy peanut butter cookies

well, we all know that recipes for peanut butter cookies are a dime-a-baker’s-dozen, and through the years they’ve been spiced up with chocolate chips, chunky peanut butter, chocolate dips and coconut, just to highlight a few. these variations augment the basic goodness, yet still beneath it all lies that peanut butter flavor and freshness.

now, i must admit, i’ve never really been a peanut butter cookie girl. they tended to be dry to me – even the ones folks raved about – and they also tended to be a bit hard or crunchy. and, as you know by now, this cookie girl tends to lean towards the soft and smooshy cookies.


so, it may come as a surprise, as it did even to me, that when i tried this recipe for peanut butter cookies, i was delighted with the results. so delighted, in fact, that i couldn’t stop scarfing them down. first, one, just to taste. then another, just to make sure that what i’d tasted had not been an apparition. then another, well, just because (did i really need to have a reason?) and by the time i’d finished my sixth cookie, i knew i’d hit upon a winner. i may have skipped dinner tonight, but six fine and sandy peanut butter cookies certainly hit the spot!

fine and sandy peanut butter cookies
ingredients:
2 cups all-purpose flour
½ teaspoon baking soda
¼ teaspoon salt
1 ¼ sticks (10 tablespoons) unsalted butter, softened
1 cup (plus 1 tablespoon) creamy peanut butter
2/3 cup baker’s sugar
2/3 cups firmly packed light brown sugar
1/3 cup firmly packed dark brown sugar
2 large eggs
¾ teaspoon vanilla extract

instructions:
1. preheat oven to 350 degrees with rack in center of oven.

2. cream the butter, peanut butter, and all sugars together, until light and fluffy. add the eggs and vanilla extract.

3. sift the flour, baking soda and salt into the creamed mixture . with a spoon (not your electric mixer), stir just until the dry ingredients are incorporated into the creamed mixture. be sure not to overmix.

4.scoop a teaspoonful of batter into your hand and roll them into a ball, then place them 2 inches apart on parchment-lined baking sheets. with a fork, flatten slightly, making a criss-cross pattern.

5. bake the cookies until they have begun to turn a sandy brown color, about 13 minutes. the cookies will be firm around the edges but will still appear somewhat softer in the centers. as with all recipes, different oven temps will produce different results. so, watch your first batch carefully, and adjust the time accordingly.

6.remove from cookie sheet, and let cool on wire rack.

7. enjoy!
yield: about 3 ½ – 4 dozen cookies.

AddThis Social Bookmark Button

tried-and-true oatmeal cookies

November 8th, 2008 thecookieblogger Posted in daily cookie diary Comments Off on tried-and-true oatmeal cookies

for years, i’ve been making oatmeal cookies. so many variations, i’ve lost track, to be honest. with nuts. with raisins. with a hint of butterscotch. drop batters and layered bars and even oatmeal-gingerbread men who looked like they had grown scales. but usually, when i’m in need of a good, favorite standby recipe, this oatmeal cookie fits the bill.

they’re filling, they’re tasty and they have a home-baked goodness about them. they keep well for a few days, though there’s usually an echo in the bare cookie jar within a few short hours of removal from the hot oven. and did i mention they’re really, really good?

…and since we keep hearing about the benefits of oatmeal to our daily diet, these cookies may even be good for you! although, i’m a firm believer that all cookies are good for you!!

tried-and-true oatmeal cookies

ingredients:
1 1/4 cup unbleached flour
1 tsp. baking soda
1 cup unsalted butter, softened
1/4 cup granulated sugar
3/4 cup firmly packed light brown sugar
1 pkg. vanilla instant pudding
2 eggs
3 1/2 cups quick cooking rolled oats
1 cup raisins (optional)

instructions:
1. preheat oven to 375 degrees.
2. mix flour with baking soda. set aside.
3. combine butter, the sugars and pudding mix in larger mixing bowl, beating until smooth and creamy.
4. beat in eggs, one at a time.
5. gradually add in flour mixture, then stir in oats (and optional raisins). batter will be stiff.
6. drop by rounded teaspoonsfuls onto parchment-lined baking sheets about 2 inches apart.
7. bake for 10-12 minutes. the cookies will be soft and slightly spongy. remove from oven and let sit for one minute on the cookie tray.
8. after a minute, gently remove cookies from tray and let cool on wire racks.

enjoy!!

AddThis Social Bookmark Button

crunchy and crackly and chocolaty, oh my!

November 7th, 2008 thecookieblogger Posted in daily cookie diary Comments Off on crunchy and crackly and chocolaty, oh my!

after i copied this recipe from some old, yellowed newspaper clipping, i shoved it into one of my many recipe boxes and completely forgot about it. many months later, i discovered it again when the recipe box fell off the shelf, and deposited just this one recipe card onto my right foot. call it clumsiness, let’s just say that when a recipe presents itself at my feet, i’m not one to ignore it. so i made this cookie that very afternoon, and was delighted with the scrumptious result.

when my husband arrived home, his excitement was clearly visible — it seems he used to purchase cookies that looked just like these at a neighborhood market back in his bachelor days, and had to give them up when they added some preservative to the recipe that just didn’t agree with him. just one bite later, and he was a happy cookie camper! they were the cookies of his bachelor days!

kids love these, but they’re also a mature enough flavor to work well for the adults on your snacking list!


crackling fudge cookies
ingredients:
2 cups (12 oz. package) chocolate chip morsels, divided
1 1/2 cups unbleached white flour
1 1/2 tsps. baking powder
1/4 tsp. salt
1 cup granulated sugar
6 tbsp. unsalted butter, softened
1 1/2 tsps. vanilla extract
2 large eggs
1/2 cup powdered sugar

instructions:
1. microwave 1 cup chocolate chips in an uncovered, microwave-safe bowl on high power for 1 minute. stir. the chips should be melted. if they are still retaining their original shape, microwave at 15 second intervals, stirring until all chips are melted. cool to room temperature.

2. mix flour, baking powder and salt in a small bowl. set aside.

3. beat granulated sugar, butter and vanilla extract in large mixer bowl.

4. beat in melted chocolate.

5. add eggs, one at a time, mixing well after each addition.

6. gradually, beat in the flour mixture.

7. stir in the remaining chocolate chips.

8. cover and refrigerate dough until firm, a few hours.

9. preheat oven to 350 degrees. using your teaspoon scoop, and rolling in the palms of your hands, form dough into 1 ½ inch balls.

10. roll in powdered sugar.

11. place on parchment-lined baking sheets. bake for approximately 10 – 13 minutes, or until the sides of the cookies set, but the centers are still slightly springy. remove from oven. cool on baking sheets for 2 minutes, then gently remove cookies to wire racks to cool completely.

enjoy!

AddThis Social Bookmark Button

the black and white cookie of my childhood

November 6th, 2008 thecookieblogger Posted in daily cookie diary Comments Off on the black and white cookie of my childhood

what kind of a new york girl would i be without lots of tasty, crumb-y memories of my all-time favorite childhood cookie – the black and white. granted, it was a bakery specialty – never to be made at home – always to be bought as a special treat from the home bakery or conti’s. but just looking at those magical discs, all lined up on their special shelf behind the counter, would make me plead with grandma or my mom for just one. and just thinking about them now makes me crave the taste of that rich cake-like cookie and its sweet and gooey chocolate and vanilla frosting combo. alas, i’ve never seen one in seattle, so if it’s a craving for a black and white that i have, well, then, i’d better get baking!

this recipe was passed along by my sister-in-law. she swore they looked and tasted just like the originals. so, rolling up my sleeves, i set out to make the perfect homemade black and white cookie. i followed the instructions to a tee, even giving up my preferred parchment-lined baking sheets for greased ones. and the end result? yummy cookies, indeed! but not quite the cookies of my youth. could it be i was missing a magical ingredient? or perhaps, as i suspect may be the case, that as i’ve gotten older, my cookie tastes have changed? whatever my feelings about black and white cookies, these are certainly worth the effort, especially if you’re providing snacks to a roomful of children! they will most certainly love them!

black and white cookies

ingredients:
2 cups sugar
1 cup (2 sticks) unsalted butter, softened
4 large eggs
1 tsp. vanilla
5 cups cake flour (you can use unbleached white flour, but the texture will be a bit different)
1 1/2 tsp. baking powder
1/2 tsp salt
1 cup milk

instructions:
1. preheat oven to 375 degrees.
2. grease 2 baking sheets.
3. mix sugar and butter until fluffy.
4. add eggs and vanilla, mixing until smooth.
5. in separate bowl, combine and mix flour, baking powder and salt
6. add 1/2 of the flour mixture to the wet ingredients. stir lightly.
7. add milk and stir lightly again.
8. add remaining flour mixture — combine just until mixed, but do not overmix.
9. using a soup spoon, or a large scoop (like an ice cream scoop), drop mixture on cookie sheets two inches apart.
10. bake for 15 minutes, just until edges brown.

white (vanilla) glaze
ingredients:
3 cups sifted confectioner’s sugar
3/4 tsp. vanilla
1/4 cup milk

instructions:
mix until smooth. if too thick, add more milk one tsp. at a time until spreadable.
makes 1 cup.

black (chocolate) glaze
ingredients:
3 cups sifted confectioner’s sugar
3/4 tsp. vanilla
6 tbsp. unsweetened sifted cocoa powder
1/4 to 3/4 cup milk (add gradually to see how much is actually needed)

instructions:
mix until smooth. if too thick, add more milk one tsp. at a time until spreadable. makes 1 1/4 cup.

frosting instructions:
ice cookies with white half first, then black half. allow to dry completely.
after icing is dry, wrap each cookie individually in plastic wrap or baggie. they store better when they are packed this way.

AddThis Social Bookmark Button

the chocolate chip cookie dilemna

November 5th, 2008 thecookieblogger Posted in daily cookie diary Comments Off on the chocolate chip cookie dilemna

my husband excels at many things. alas, baking and cooking are not two of those skills. now, don’t get me wrong. he can make an excellent pancake. and his version of “clams” is yummy, though not remotely associated with any form of seafood i’ve ever eaten.

so when we were married, i gained a new husband – and five beat-up, old recipe cards he’d brought to our marital kitchen. two were his mom’s recipes for crepes and dumplings (neither of which i can duplicate), one was for his version of cheap coffee cake (which i’ve never attempted), and one was for his version of pizza (ingredients included one phone and one checkbook. order take-out. enjoy!)

that’s only four, you say? well, that’s correct. the fifth recipe card created quite a stir, so to speak. i remember flipping to that card and catching my breath as it stared back at me in horror.

chocolate chip cookies.

now, you must understand that i’d been making chocolate chip cookies for a lot longer than i suspect he had. and my choco chip snacks were pretty darn tasty.

actually, better than that.

they were good.

really good.

and here i had this chocolate chip cookie recipe staring at me, expecting me to just switch camps after years of successful cookie baking, just because i’d had a name change.

okay, perhaps that is trite. but, i’d had a long and successful relationship with my chocolate chip cookie recipe, and now this…this imposter, had wiggled it’s little way into my recipe box. what was a cookie girl to do?

well, i did what any baker would do…i filed his card in the back of the box in the hopes it would be forgotten. ah, but as fate would have it, soon after our vows were exchanged, there came an opportunity to bake the dreaded cookie.

so, i made chocolate chip cookies. my recipe. i thought to myself, ‘he’ll never know the difference.’ and my cookies are so good, they’ll make him forget his own recipe.

but the best laid plans….

he ate the cookies up. and then he asked me if i’d remembered to use his recipe, because they didn’t quite taste the way his had.

what?! he hadn’t swooned over my perfect cookie recipe?? that old recipe card didn’t become obsolete by just the mere whiff of my sweet treats? ack! i was caught red-handed! there was nothing to do but ‘fess up to the dastardly act. and in the spirit of marital compromise, to promise to give his cookie recipe a try.

a few weeks later i did just that. i pulled out that sad-looking recipe card stuffed in the back of the box, and i followed the instructions….and i baked a batch of cookies.

not just any batch of cookies. good cookies.

actually, better than good cookies. very good cookies.

alright, i’ll say it. they were better than my original recipe. yes, it’s true. and i’m not just saying that to score cookie points with my hubby. it’s the honest truth. they are tasty, chocolaty, soft, yet firm. and the key step to their success, i believe, is the ‘overnight in the fridge’ step. it’s amazing how the sugars all meld together, and they make the cookie a much smoother, much richer cookie than any i’d ever baked before.

so, along with this outstanding chocolate chip cookie recipe, i offer you a friendly word of advice: if your husband (or wife) provides you with a cookie recipe, give it a try. you may not know what you’re missing!


chocolate chip cookies a la owen
(in his own words)

2 ¼ cups all-porpoise flour
1 tsp. baking soda
1 tsp. salt
mix those together and set ‘em aside.

1 cup (2 sticks) butter, softened
¾ cup sugar
¾ cup brown sugar
1 tsp. vanilla extract
2 eggs
2 – 2 ½ cups of chocolate chips (e.g., a 12-ounce bag or maybe a little more)

get the ol’ mixer bowl. mix the butter, sugar and vanilla together, then add the eggs and beat them thoroughly. once you’ve done that, then add the flour mixture. don’t dump it all in at once unless you want the whole kitchen to be a horrendous white dusty mess. with that done, the cookie dough is ready; now just add the chocolate chips that you haven’t foolishly eaten yet. put the dough in the refrigerator and leave it there for the night.

the hard part: don’t just eat all the cookie dough now. think salmonella.

the next day, heat the oven up to 375 degrees. put the dough onto an ungreased cookie sheet in little cookie-dough lumps. do not eat them yet. put them into the oven for about 10 minutes, or generally speaking until they look like they’re cooked. keep on doing this until you’re out of cookie dough.

now you can eat them.

AddThis Social Bookmark Button

genitas: little drops of sunshine

November 4th, 2008 thecookieblogger Posted in daily cookie diary Comments Off on genitas: little drops of sunshine

today, i found myself missing my dad who’s 3000 miles away in florida. we call him poppy. now poppy shares my love of cookies, though we’ve had our friendly disagreements over the years. he likes his oatmeal cookies hard and crunchy, while i’m a soft oatmeal cookie fan. he likes crispy edges on his sugar cookies, while i’d rather something a bit lighter and softer.

but the one cookie we can both agree on are genitas. they are small droplets of sunshine, with lemon infused throughout and a tart, lemon frosting glazed atop. in my bronx neighborhood pastry shops, these italian cookies always seemed a little too dry and crumbly to appeal to my childhood cookie sensibilities. however, as i’ve grown older, i find that one or two of these cookies with a refreshing glass of iced tea, or a strong cup of espresso, can be just the right after-dinner dessert. not too sweet, not too tart. i still dislike the very dry versions of these cookies, but have perfected my own recipe so they are a bit more cake-like, yet still hold the flavor and essence of those original bronx versions.

so, as i prep the batter on these delicious little treats today, i think of poppy. i’m hoping that these genitas will find a welcome spot in your family’s cookie jar, as they have in mine! enjoy!

genitas

ingredients:
3 eggs
1/2 cup whole milk
1/2 cup sugar
2 1/2 teaspoons lemon extract
1/2 cup vegetable oil
3 cups unbleached flour
8 teaspoons baking powder

instructions:
1. preheat your oven to 350 degrees.
2. in a separate bowl, mix flour and baking powder.
3. with your electric mixer on medium speed, beat eggs, milk, sugar, lemon extract and vegetable oil until well blended.
4. add flour and baking powder on low speed, mixing just until blended. do not overmix – the dough should be sticky and soft.
5. keep a bit of additional flour nearby so that you can dust your teaspoon, your fingers and the dough lightly as you drop them onto the cookie sheet. spacing them about two inches apart, drop a teaspoon of dough onto cookie sheet covered with parchment paper (if you do not have parchment paper, lightly grease your cookie sheet.)
6. bake for 8 to 10 minutes, or until slightly browned.
7. remove from oven and carefully remove cookies to a wire rack for cooling. sometimes, these cookies may be crumbly while trying to remove them from the cookie sheet, so proceed carefully! i use a metal spatula, and it seems to do the trick.
8. when cookies are completely cooled, frost with lemon frosting (recipe follows).

lemon frosting

ingredients:
3 cups confectioners’ sugar
3 teaspoons lemon extract
1/2 cup warm water

instructions:
1. place wax paper beneath your wire rack. (this will make for easier clean-up of the surface beneath the cookies!)
2. with your electric mixer beat all ingredients until smooth and syrupy. you may need to add a few more drops of warm water after you have beat all the ingredients, if you find the frosting is too thick.
3. holding a completely-cooled cookie upside down, dip into the bowl of frosting. when the top and sides of the cookie are completely covered with frosting, hold upright and place onto the wire rack. frosting will ooze off the cookie onto the rack and the wax paper beneath the rack, but that’s what you want it to do! the cookie should still be covered with frosting. repeat with all remaining cookies.
4. let the frosting dry. depending upon the humidity, this may take a number of hours. be sure frosting is completely dry before storing.
5. store in airtight container.
enjoy!!

AddThis Social Bookmark Button

traditional, tasty anise toasts

November 3rd, 2008 thecookieblogger Posted in daily cookie diary Comments Off on traditional, tasty anise toasts

to dunk or not to dunk, that is the question! these anise toasts are some of the most traditional biscotti i remember eating as a child. apart from being the first cookie many italian children eat, they are the perfect adult cookie to be eaten with a demitasse or a cup of strong coffee.

though i’m not a dunker, i do remember adults around me dunking when i was a small child, and i always thought they looked really silly, though quite content. i’m still not sure if the coffee accents the flavor of the cookie, or the cookie flavor melds into the cup of hot brew. in any case, they work well together, and i’ve only grown to love these cookies more as my tastes have matured.


this recipe is based upon a recipe from sweet maria’s italian cookie tray by maria bruscino sanchez. i highly recommend maria’s cookbooks – each one is filled with a delightful array of italian sweets!

anise toasts
ingredients:
3 eggs
1/2 cup sugar
1/2 cup vegetable oil
1 tablespoon anise extract (do not use anisette, as the flavor will not be as potent)
3 teaspoons baking powder
2 1/2 cups all-purpose, unbleached flour

instructions:
1. preheat oven to 350 degrees.
2. beat eggs, sugar, oil and anise extract together until they are well blended.
3. gradually mix in the baking powder along with 1 – 1 1/2 cups flour until blended.
4. remove dough to a lightly-floured board and knead in the remaining flour. you may not need to use all of the remaining 1 cup, but the dough should not be sticky. Once it loses its stickiness, you’re in good shape.
4. divide the dough into two pieces, and form a 10-inch long loaf
5. line a cookie sheet with parchment paper and place the loaves a few inches apart on the sheet.
6. bake 20-25 minutes, until golden brown and toasty. remove from oven.
7. carefully lift the loaves off the cookie sheets and cool on wire rack. (the easiest way to lift the loaves off the sheet is to use two offset spatulas to lift.)
8. After the loaves are cool, place on a cutting board and using a serrated knife, slice each loaf diagonally into biscuits approximately 1/2 inch thick. place on cookie sheet, leaving a little bit of space between each cookie.
9. bake in 350 degree oven for approximately 11-14 minutes, or until sides of each cookie are golden brown. remove from cookie sheet and cool on wire rack.
enjoy!!

AddThis Social Bookmark Button