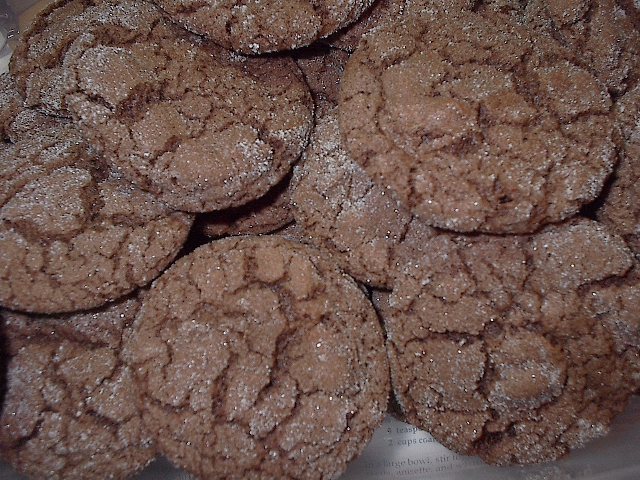
coconut washboards

July 23rd, 2009 thecookieblogger Posted in daily cookie diary Comments Off on coconut washboards

there are some cookies that go way back, having held a place of honor in the family cookie jar for as long as anyone can remember. these are not holiday cookies or special cookies we are talking about. these are everyday, “grab one after school on your way out to ride your bike with friends or play stickball out in the street” type of cookies. unfortunately, i don’t have childhood memories of these cookies, but many of my friends (and a few of my blog readers) do, and they were highly recommended to me. this recipe, based on one created by the queen of cookies, maida heatter, in her classic cookie book, maida heatter’s book of great cookies is outstanding. delicious, with a real ‘old-world’ taste and texture, they are cookie perfection.
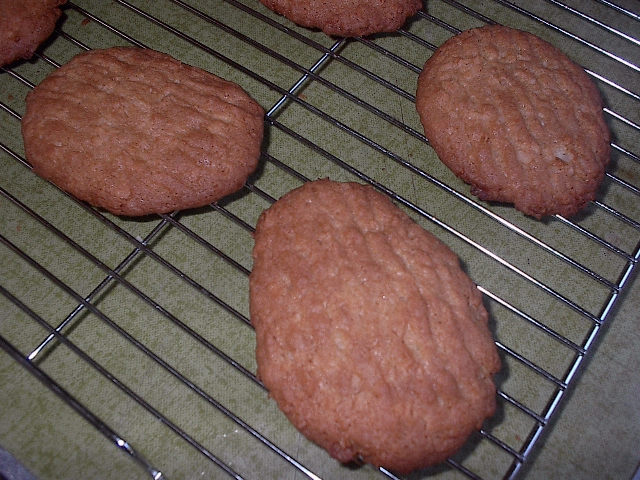


coconut washboards
ingredients:
2 cups sifted all-purpose flour
3/4 teaspoon baking powder
1/4 teaspoon baking soda
1/8 teaspoon salt
1/4 pound unsalted butter, softened to room temperature
1/2 teaspoon vanilla
1 cup light brown sugar, firmly packed
1 egg
2 tablespoons water
4 ounces (approximately 1 1/4 cup shredded sweetened coconut

instructions:
1. in your mixer, cream the butter until light and fluffy.
2. beat in vanilla
3. add the brown sugar and blend well
4. add the egg and water and blend well
5. sift the dry ingredients into the wet ingredients, blending well on very low speed, just until incorporated.
6. stir in the coconut.
7. prepare baking sheets with parchment paper. with your #100 scoop, place a large mound (a heaping teaspoonful) of cookie dough onto the baking sheet. continue, placing dough mounds approximately 2 1/2 inches apart (you should fit about 8 mounds on the sheet). refrigerate for about 15 minutes, until mounds get firm – this will make it easier for you to form into the washboard shape.
8. preheat your oven to 375 degrees.
9. once the mounds are firm, remove from the refrigerator. in your hands, roll each mound into a log and place back on baking sheet. with the back of a metal spatula dipped in flour, press down on the log so that it flattens out the back of the log. your log may stick to the back of the spatula – if it does, just use a second offset metal spatula to gently scrape it off the back and place the formed cookie back onto the baking sheet.
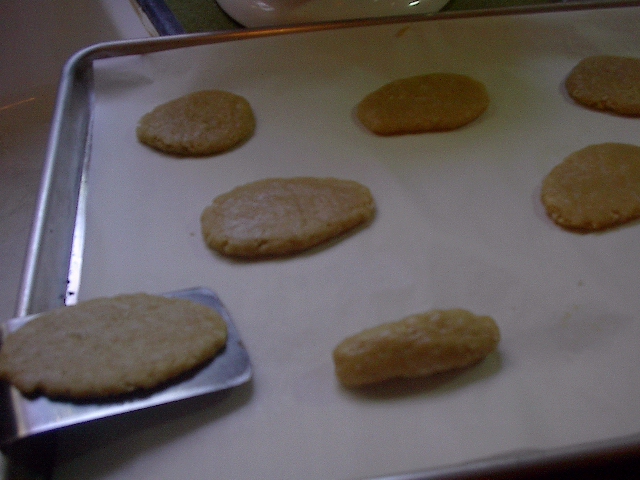


10. dip a fork into some flour, and gently scrape the fork lengthwise through your now-flat log. it will create long indentions in your dough which will give your cookies the ‘washboard’ effect.
11. bake your cookies for 12 -13 minutes, turning the baking sheet once midway during the baking process. bake until the cookies look golden brown. remove from oven.
12. let cookies rest for 3 minutes on the baking sheet, then remove to wire rack to cool completely.
enjoy!
yield: 26 cookies

AddThis Social Bookmark Button

double chocolate brownies

July 22nd, 2009 thecookieblogger Posted in daily cookie diary Comments Off on double chocolate brownies

if you are a fan of moist, rich brownies, then this is the brownie recipe for you! these brownies are delicious (and easy) as is, but adding a ganache icing really puts them over the top! the combination of the cocoa and the hershey’s syrup make a really moist, almost chewy brownie, and the ganache raises the ‘chocolate lover’s meter’ off the charts!

here we have a tray full of brownies, frosted and ready to be cut!


and here we have brownies, all cut up and ready to be eaten!


double chocolate brownies
ingredients:
1 cup unsalted butter
2 cups baker’s sugar
2 teaspoons vanilla
4 eggs
3/4 cup dutch process cocoa
1 cup all-purpose flour
1/2 teaspoon baking powder
1/4 teaspoon salt
1/4 cup hershey’s syrup
1 cup chopped walnuts (optional)

instructions:
1. preheat oven to 350 degrees. grease 13×9 brownie pan (or spray with non-stick, unflavored baking spray).
2. melt the butter in a microwaveable bowl. remove from microwave and mix in sugar and vanilla.
3. add eggs, one at a time, beating well after each addition.
4. add cocoa, beating until well-blended.
5. add flour, baking powder and salt, beating until well-blended.
6. add hershey’s syrup, blending until well-blended.
7. if you are using nuts, stir them in to the batter at this point.
8. pour brownie batter into prepared pan.
9. bake 30 minutes. brownies will begin to pull away from the side of the pan. remove from oven.
10. cool completely, in pan, on wire rack. when completely cooled, frost with ganache (recipe follows!)

chocolate ganache frosting
ingredients:
8 ounces bittersweet chocolate, broken into small pieces
1 cup heavy whipping cream

instructions:
1. over low heat and while continuously stirring, melt the chocolate pieces in a heavy-duty saucepan, until most pieces have completely melted.
2. remove from heat and let cool for a few minutes.
3. whisk in the heavy cream into the melted chocolate, stirring continuously until all cream is incorporated into the chocolate and mixture begins to thicken.
4. let sit for a approximately ten minutes, whisking every few minutes. the ganache should be slightly thick and very smooth, and easily spreadable. spread the frosting on your pre-cut brownies (still in the pan), and let set for a few hours. for a quick set, place pan in refrigerator for approximately 1 hour.
5. cut brownies into bars and enjoy!

AddThis Social Bookmark Button

scotchy spice cookies

July 20th, 2009 thecookieblogger Posted in daily cookie diary Comments Off on scotchy spice cookies

once upon a time, i was trying to multi-task while baking spice cookies. seriously, i was just making the dough for a basic spice cookie with cinnamon and ginger, with the plan to roll it into a slice-and-bake log, throw it in the fridge and bake it the next day. while i was beating the butter and brown sugar, the phone rang, and as often happens, i got distracted. i continued prepping the cookie dough, and towards the end, followed the instruction “fold in the butterscotch chips”. so, being the good cookie baker that i am, i continued chatting, and pulled the butterscotch chip container off the shelf, measured out 12 oz. and added them to the batter.

a moment or two later, i realized that the recipe staring up at me from the book was no longer my spice cookie recipe. i guess while i was chatting, a ‘gust of wind’ must have flipped to a butterscotch chip cookie recipe. oops! so, instead of making it a slice-and-bake cookie, i turned it into a drop cookie, and, it turned into quite the good little recipe! i like the combo of the flavorful spices with the sweet butterscotch chips. and as a drop cookie, they are chewy little gems. i like them, but i want to know if you like them! please let me know! and enjoy!

here’s what the cookie dough looks like:


…and here’s a pile of the baked cookies!


updated 07/22/09… got positive reviews from the seattle opera ring cycle crew on these cookies! of course, it could be they’re all so overtired and delirious, they don’t have any idea what they’re even eating!

scotchy spice cookies
ingredients:
1 cup unsalted butter, softened to room temperature
1 1/2 cups light brown sugar
1 egg
1 teaspoon vanilla
2 cups all-purpose flour
1 teaspoon cinnamon
1 teaspoon ground ginger
1 teaspoon baking soda
1/2 teaspoon salt
12 ounces butterscotch chips
1/2 cup confectioner’s sugar

instructions:
1. in a small bowl, blend together the flour, cinnamon, ginger, baking soda and salt. set aside.
2. cream together butter and brown sugar until light and fluffy.
3. blend in egg and vanilla into butter mixture until well-blended.
4. add the flour mixture into the wet ingredients and blend just until combined. do not overmix.
5. fold in the butterscotch chips.
6. cover and refrigerate the dough for approximately 1 hour.
7. preheat oven to 350 degrees. line baking sheets with parchment paper
8. using your #40 scoop, roll dough into balls and roll the balls into the confectioner’s sugar. place on baking sheets approximately 2 inches apart.
9. bake for 10-12 minutes — edges should be firm and cookies should be gently browned. remove from oven and cool on baking sheet for 2-3 minutes. remove from baking sheet to wire rack to cool completely.
enjoy!
yield: approximately 45 cookies.

AddThis Social Bookmark Button

cinnamon twisties

July 19th, 2009 thecookieblogger Posted in daily cookie diary Comments Off on cinnamon twisties

a number of years ago, i worked with a woman who didn’t consider herself a good baker, but time and again she would bring baked goods in to the office, and they were always very tasty. she had come from a long line of ‘home bakers’ and she’d inherited a number of their recipes, which she was happy to share with me! this flaky cinnamon cookie has always been one of my favorites! the cream cheese in the dough helps make this a flaky, not-too-sweet cookie, and the combination of cinnamon and ground walnuts add both texture and flavor to these twisted cookies! they are perfect with a cup of coffee, and they are light enough so you can eat a few without feeling too full!


cinnamon twisties
ingredients:
1 8 oz. package of cream cheese (full-fat. do not use low fat or fat free – it will change the texture of the cookie)
1 cup unsalted butter, softened to room temperature
1 1/2 cups all-purpose flour
1 cup walnuts
1 cup baker’s sugar
2 teaspoons ground cinnamon
1 large egg, beaten

instructions:
1. beat cream cheese and butter until light and creamy (this should take approximately 3 minutes)
2. add 1/2 the flour, beating until well-blended. add the remaining flour, using a spatula or spoon to mix. be careful not to overmix.
3. lay plastic wrap flat on your table — dust with a bit of flour and then press dough into a 9-10 inch square. wrap with plastic wrap and refrigerate at least 3 hours (i have often made this the day before and refrigerated the dough overnight.)
when you are ready to bake…
4. using your food processor, process walnuts with 1/2 cup baker’s sugar until walnuts are finely ground. in a small bowl, blend the walnut mixture with the cinnamon and the remaining baker’s sugar.
5. preheat the oven to 400 degrees. line baking sheets with parchment paper.
6. lightly beat egg to use as egg wash on rolled dough.
7. on a lightly floured board, roll out dough to create a 12 x 11 rectangle. lightly brush the dough with your egg wash. press the walnut/sugar/cinnamon mixture into the dough, completely covering the surface. flip over your dough onto the lightly floured board, and repeat with egg wash and walnut/sugar/cinnamon mixture.
8. using a rotary cutter or pizza cutter, cut the rectangle into three strips lengthwise. then cut crosswise into 1/2 strips.
9. pick up with small spatula, twist each piece twice and place on prepared baking sheet.
10. bake approximately 15 minutes, until cookies are lightly browned. remove from oven.
11. let cookies cool on baking sheet for 1-2 minutes, then transfer cookies to wire rack to cool completely.
enjoy!
yield:approximately 70 cookies.

AddThis Social Bookmark Button

chocolate chewies

July 16th, 2009 thecookieblogger Posted in daily cookie diary Comments Off on chocolate chewies

these cookies are similar to my crackly fudge cookies, but they have a lighter weight and lighter taste to them. using semi-sweet mini chocolate chips and even measures of both baking powder and baking soda, the cookie batter is almost airy pre-baking. once baked, these cookies are light and tasty. prior to baking they are rolled in granulated sugar which gives a bit more added sweetness, but not the heavy coating traditionally given to these cookie types by confectioner’s sugar.


chocolate chewies
ingredients:
8 oz. mini chocolate chips, melted (you can slowly melt the chips in the microwave, or use a double boiler on your stovetop)
1/2 cup unsalted butter, at room temperature
1 cup baker’s sugar
2 eggs
2 cups all-purpose flour
1/4 teaspoon table salt
1/2 teaspoon baking soda
1/2 teaspoon baking powder
about 1/2 cup granulated sugar for rolling cookies

instructions:
1. preheat oven to 350 degrees. line baking sheets with parchment paper.
2. in your mixing bowl, butter and baker’s sugar until well combined and fluffy.
3. beat melted chocolate and eggs into the butter mixture.
4. add flour, salt, baking soda and baking powder into the butter mixture, mixing on low speed until dry ingredients are well-blended.
5. with your #40 cookie scoop, drop 1″ balls directly into your bowl of granulated sugar. coat completely.
6. place on baking sheet, approximately 2 inches apart.
7. bake each baking sheet individually for 13 minutes, until cookies appear firm and tops have cracked a bit.
8. remove from oven, allowing cookies to set for 1-2 minutes on the baking sheet. remove to wire rack for complete cooling.
enjoy!
yield:approximately 40 cookies.ed

AddThis Social Bookmark Button

maple grahams

July 14th, 2009 thecookieblogger Posted in daily cookie diary Comments Off on maple grahams

i love the hearty flavor of graham crackers, and find that graham cracker crumbs add a nice bit of texture as well as a boost to the flavor of many cookies. so, when i was experimenting with the maple flavoring i recently purchased from king arthur flour, i thought the combo of graham cracker crumbs and maple flavoring would be a good idea. i was quite correct! and though it’s the middle of july, i expect this cookie will get a lot more baking time once the cool autumn weather arrives. it’s a perfect cookie for your fall cookie jar. but don’t discount it’s summertime uses — these cookies are amazing with some vanilla ice cream!


and one side note: though these cookies are quite good ‘naked’, i’ve included a frosting that would work really well with this recipe! why not give it a try?

maple grahams
ingredients:
1 cup unsalted butter, softened to room temperature
1 cup baker’s sugar
1 egg
1 teaspoon maple flavoring
1 1/2 cup graham cracker crumbs
1 cup all-purpose flour

instructions:
1. in your electric mixer, beat butter and sugar until light in color and creamy.
2. beat in egg and maple flavoring until well combined.
3. add graham cracker crumbs and flour to butter mixture, mixing until well combined.
4. refrigerate for at least one hour, but not more than 5 hours.
5. preheat oven to 325 degrees. prepare baking sheets with parchment paper.
6. with your #40 scoop, place dough approximately 1 1/2 inches apart on the baking sheet.
7. bake one baking sheet at a time for 15-18 minutes, until edges of cookies look set and cookies look firm.
8. remove from oven and let sit on baking sheet for 2-3 minutes. remove from baking sheet to wire rack and cool completely.
enjoy!
yield:approximately 44 cookies.

brown sugar frosting
ingredients:
1/2 cup light brown sugar
3 tablespoons unsalted butter
1/4 cup whole milk or whipping cream
2 cups powdered confectioners sugar

instructions:
1. in a heavy saucepan, bring butter and brown sugar to a boil, stirring frequently, until ingredients are smooth. let cool slightly and transfer to a mixing bowl.
2. add milk and confectioners sugar to cooled butter/sugar mixture, and mix until smooth (i find the whisk attachment on the kitchenaid mixer works really well for this).
3. spread onto cookies!
enjoy!

AddThis Social Bookmark Button

bake it again, sam…

July 12th, 2009 thecookieblogger Posted in daily cookie diary Comments Off on bake it again, sam…

there are some recipes that get pulled out of my recipe box over and over again. today, i am repeating two of my favorite recipes — in order to send some cookies down to the opera tomorrow. thin and crispy oatmeal cookies are one of my favorite cookies, and they have lots of healthful oats in them. And crackly fudge cookies are one of my husband’s favorite cookies, so i know he’ll be happy to munch and share at work! both cookies are really simple to bake, and not time consuming, so you can whip up both cookies quickly, easily and effortlessly!


AddThis Social Bookmark Button

yet-another version of chocolate sprinkle cookies!

July 10th, 2009 thecookieblogger Posted in daily cookie diary Comments Off on yet-another version of chocolate sprinkle cookies!

yes, it’s true i’m continuing my mission to recreate conti’s sprinkle cookies. but this time, i am close. very, very close! i found a ‘jumping-off point’ recipe online and then played around with the amounts, with the ingredients and with the baking time. so, of course, now it’s a completely different recipe than what i started with! but i love to experiment, and i love to play around with ingredients, so it’s all good!

you’ll notice this recipe is different than others here on thecookieblogger.com, because the original recipe called for grams instead of cups, and so, using my handy escali scale from king arthur flour, i continued measuring in grams. it is one of the handiest tools i have in my kitchen — i use it much more often than i originally expected, so it’s been a good investment for me!

i’d be remiss if i failed to mention another tool i used for these cookies — my wilton cookie pro ultra ii cookie press. i find this cookie press easy to use, easy to clean and i love that it comes with 16 different discs! i have had bad luck with other cookie presses in the past, but this one really holds up to lots of use, and it’s comfortable for my carpal tunnel wrists.

i’ll be curious to hear what you think of this recipe. the cookies are very reminiscent of those cookies found in italian bakeries or in the greek diners in new york. but, no fear, my hunt for the perfect recipe is not quite over. i will rework this one just a bit to add some more flavor and increase the thickness of the cookies to make it perfectly authentic!


chocolate sprinkle cookies v.3
ingredients:
165 g unsalted butter
90 g confectioner’s sugar
2 egg yolks
165 g all-purpose flour
100 g cornstarch
1/2 teaspoon vanilla extract
1/2 teaspoon almond extract

instructions:
1. preheat oven to 350 degrees. line baking sheets with parchment paper.
2. in mixer bowl, cream butter and sugar until they are well-combined, light and fluffy.
3. add the egg yolks, sift in the flour and cornstarch, vanilla and almond extracts. mix just until well-blended.
4. using cookie press, place cookie dough on prepared sheets.
5. bake for 12-14 minutes until edge begin to lightly brown.
6. remove from baking sheet and cool completely on wire rack.
7. dip edges in melted chocolate, and dip in chocolate sprinkles.
enjoy!
yield: approximately 30 cookies

AddThis Social Bookmark Button

a flavor twist on traditional pizzelles

July 9th, 2009 thecookieblogger Posted in daily cookie diary Comments Off on a flavor twist on traditional pizzelles

you may be wondering why your cookieblogger is talking pizzelles today, deep in the midst of summer. yes, i admit they are front and center on most christmas tables, due to their snowflake-like appearance, but, dear friend, pizzelles are even more at home in the heat of summer! what cookie is light and refreshing with a bowl of fruit or ice cream — yet with one quick ‘flick of the wrist’ can turn from cookie into delectable ice cream cone?! and pizzelles are loved by adults and kids alike, so they’re great for a light dessert cookie on your bbq table!

one of the comments i often hear regarding pizzelles is that the traditional anise flavoring is not everyone’s favorite taste. it’s understandable that anise can be an acquired taste, and may be a bit too intense, especially for children who have not grown up with it. but that’s one of the joys of baking pizzelles — you can choose whichever flavor you prefer, and, as you’ll see in this recipe, an excellent pure vanilla extract works very well to make a pizzelle that’s both flavorful and cookie-eater-friendly!

remember you need to have a pizzelle iron to make these cookies. i use the villaware v3600-ns prego nonstick pizzelle baker and have been using one for years. this machine makes thin and crispy cookies, is quite easy to work with, and is virtually indestructible!

lastly, many bakers shy away from these cookies, assuming they are difficult to make! nothing could be farther from the truth! the batter is very easy to make, the pizzelle baker is easy to use, and these cookies are quick and easy to create! give them a try and let me know what you think!


vanilla pizzelles
ingredients:
6 eggs
3 1/2 cups all-purpose flour
1 1/2 cups baker’s sugar
2 1/2 tablespoons pure vanilla extract
1 cup unsalted butter, melted and cooled a bit
4 teaspoons baking powder

instructions:
1. melt butter (microwave works fine for this!) and let cool.
2. preheat pizzelle maker according to machine instructions.
3. mix eggs and sugar until well-blended.
4. add cooled butter and vanilla extract.
5. sift flour and baking powder into the wet ingredients until well-combined and smooth. dough will be a bit sticky.
6. drop by teaspoonful (i use a #100 zeroll scoop) in the center of each wafer spot on the pizzelle maker.
7. check for desired ‘color’ (this may be as quick as 1 minute) and lift out with a fork to a wire rack for complete cooling.
8. when all pizzelles are completely cool, sift some confectioner’s sugar on each cookie. store in covered container. they will stay fresh for at least one week, though they usually don’t last that long!
enjoy!
yield: approximately 50-55 cookies

AddThis Social Bookmark Button

banana chocolate chip mini muffins

July 8th, 2009 thecookieblogger Posted in daily cookie diary Comments Off on banana chocolate chip mini muffins

alright, so this isn’t a cookie. but it is a ‘you can’t just eat one’ snack – and it’s chock-full of chocolate chips – and bananas! and since i made some for today’s snack, i thought you wouldn’t mind if i shared this recipe as today’s ‘cookie’…so, for today, the banana chocolate chip mini muffin has been named ‘honorary cookie’.

these are ultra-simple to make, and they will fly off your countertop before you can wash the mini muffin pans. they are quite moist, they keep well for up to 3 days, and are favorites amongst kids and adults alike. if you’d like to make them even tastier, feel free to add 1/2 cup of chopped toasted walnuts to the batter. i tend to keep them nut-free for my nut allergy friends, but they are good with or without nuts!

i received this recipe for the full-sized muffins from a friend a number of years ago… since then, i have tinkered with the recipe to make them bite-sized, and often serve them as a breakfast snack to the load-out crew at the rep. tomorrow, however, they will make their ‘opera debut’ when they ‘go to work’ with hubby!


banana chocolate chip mini muffins

ingredients:
2 large eggs
1/2 cup vegetable oil
1 cup light brown sugar
1/2 teaspoon vanilla extract
5 medium bananas, mashed
2 cups all-purpose flour
1 teaspoon baking powder
1/2 teaspoon salt
1 cup mini chocolate chips

instructions:
1. preheat oven to 350 degrees. line mini muffin tins with mini muffin cups.
2. in a large mixing bowl, mix eggs, oil, brown sugar and vanilla until well blended.
3. add mashed bananas to wet ingredients and mix well.
4. add remaining dry ingredients (except mini chocolate chips) and mix just until combined (do not overmix.)
5. fold in the mini chocolate chips
6. with #100 scoop, fill muffin cups 3/4 full.
7. bake for approximately17-18 minutes, until muffins look firm and tops begin to lightly brown.
8. remove from oven, and gently remove muffins from pan onto wire rack to cool completely.
enjoy!
yield: approximately 70

AddThis Social Bookmark Button