
these light and tasty cookies are close cousins to the ever-popular snickerdoodles. but instead of that crispy crunch of a snickerdoodle, these honey-sweetened delights are soft and airy. the dough itself is quite soft, so it’s best to use a small scoop to set them on your parchment-lined baking sheet – that will be much easier than trying to roll them between your palms. and just a sprinkle of cinnamon sugar (or in my case, i used king arthur flour’s cinnamon sugar plus, which is *awe-some*!) adds some terrific flavor!
also, i am a big fan of purchasing and using local honey, especially with its health benefits in helping build up allergy immunities. and in this case, i used one of my favorite local honeys (the honey hole honey company), with their beekeeper and his hives being only 2 blocks from my home! can’t get much more local than that!
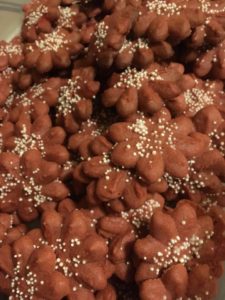
honey pillows

ingredients:
1/3 cup unsalted butter, softened to room temperature
2/3 cup honey
3/4 teaspoon baking soda
1/2 teaspoon cream of tartar
1/4 teaspoon salt
1 large egg
1 1/2 cups all-purpose flour
1 1/2 tablespoons cinnamon sugar plus (or make your own 1 1/2 tablespoon baker’s sugar combined with 1/2 teaspoon ground vietnamese cinnamon
instructions:
1. preheat oven to 375 degrees. line baking sheets with parchment paper.
2. in your large mixing bowl on medium speed, beat butter for about 1 minute.
3. add the honey, baking soda, cream of tartar, and salt, beating at medium speed until well combined. be sure to scrape the bowl from time to time.
4. add the large egg, beating until well combined.
5. turn off your mixer, add the flour to the wet ingredients, and begin on low speed, combining the flour until it is just combined and there are no dry ingredients visible in the bowl. don’t be tempted to overmix!
6. with a small teaspoon scoop, drop dough 2 inches apart onto your parchment-lined baking sheet.
7. sprinkle each mound of dough with cinnamon sugar.
8. bake for 8-9 minutes until edges are just starting to firm up.
9. remove from oven, letting cookies stay on baking sheet for about 1 more minute. then remove cookies to wire rack for complete cooling.
10. enjoy!
<yield: 34 cookies>


 5. preheat oven to 350 degrees. prep baking sheets with parchment paper.


 bake for 9 minutes or until golden brown. remove cookies to wire rack to cool.

